Are you wondering how to create a WooCommerce custom product layout with ProductX? If your answer is yes, then you’ve landed in the right place.
Your online store’s shop page has all the fancy products that you want to sell. Customers interact with the WooCommerce shop page most, that’s why it needs special attention.
Sadly, the default WooCommerce shop page is too plain and doesn’t offer you too many customization options. For that, there are several WooCommerce extensions available that you can use to enhance your online store.
Among these, ProductX is a handy plugin that allows you to display your products most appropriately. With it, you’ll be able to make the most out of your eCommerce store.
In this article, we’ll be showing you to make gorgeous layout designs for your WooCommerce shop page with the help of the ProductX plugin. So, let’s get started!
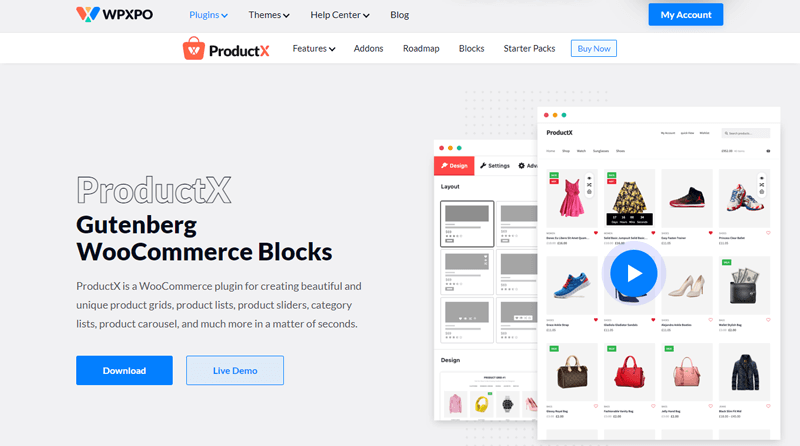
Introducing ProductX – Get Custom Product Layout for WooCommerce
ProductX is a Gutenberg WooCommerce blocks plugin that’s useful for expanding the WooCommerce functionalities. This plugin helps you create modern and stylish product layouts for your eCommerce store.
It comes up with a variety of product blocks that allows you to create stunning shop pages without the coding required. Specifically, you can use it to build product grids, product lists, product sliders, product categories, etc.
Note that, you’ve complete freedom to create your shop pages in the way you like with ProductX. This plugin makes product listing too easy.
Apart from that, it has WooCommerce-specific features like product comparison, quick view, wishlist, and product image flip. With ProductX, you can display new products, best-selling products, featured products, on-sale products, etc.
To sum up, ProductX is an all-in-one solution that every store owners need to create a well-maintained and conversion-focused eCommerce store.
Want to read a full review of the ProductX WooCommerce blocks plugin? If yes, then check out this blog.
How to Make WooCommerce Custom Product Layouts with ProductX?
Here, we’ll be showing you how to use ProductX to create WooCommerce shop layouts. So, follow along with us as we guide you into this.
1. Installing the ProductX Plugin (Free Version)
First and foremost, let’s see how we can install the free version of the ProductX. To install the free version of the ProductX plugin, you’ve to log into your WordPress dashboard. Only from there, we’ll be able to install this plugin.
Once you reach there, head into Plugins > Add New. With that, you’ll be redirected to another page. Now, on the top right corner of the screen, you’ll see a search box. There you’ve to type ‘ProductX’. The moment it appears, you’ve to click on the Install Now button to start the installation of the plugin.
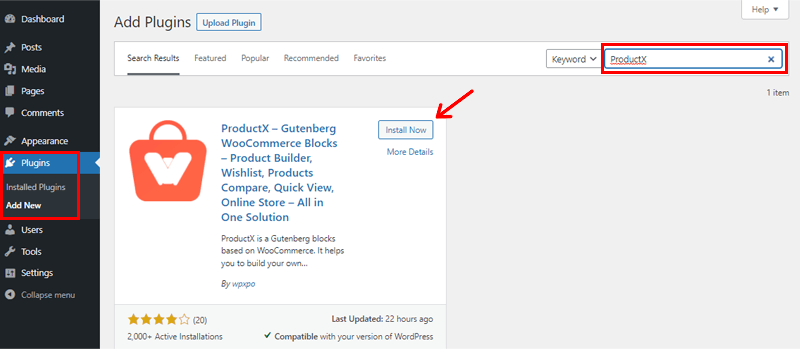
After waiting for a few seconds, Activate button will pop up. You need to click on it to get the ProductX plugin activated on your site.
2. Installing the ProductX Plugin (Premium Version)
You need to buy the premium version in order to use it. So, let’s check out all the steps needed to purchase ProductX Pro.
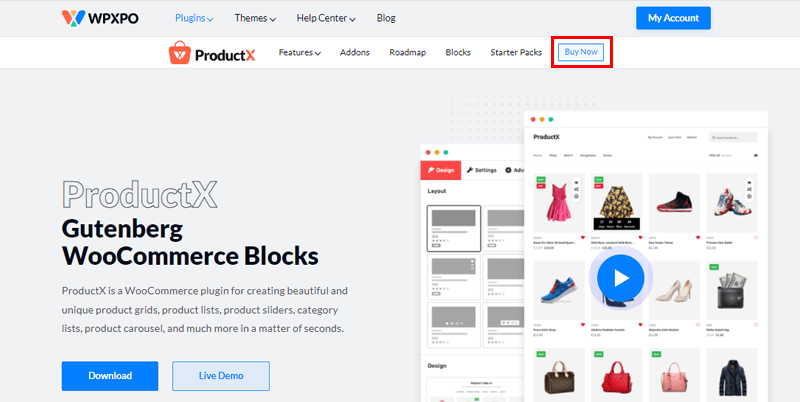
To purchase ProductX Pro, you must visit WPXPO’s landing page.
On the navigation menu, you’ll see a Buy Now button. Click on it, and with that, you’ll be redirected to the ProductX pricing page.
There you’ll see 3 different pricing options, select the best plan for you and click on the Get Started button.
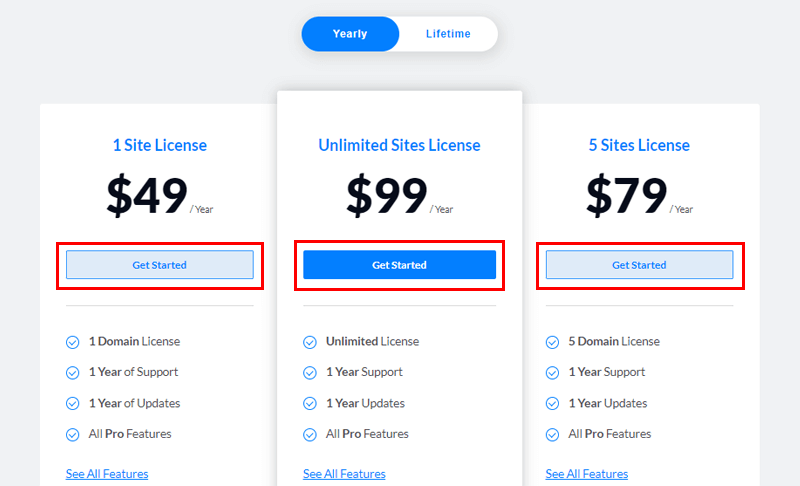
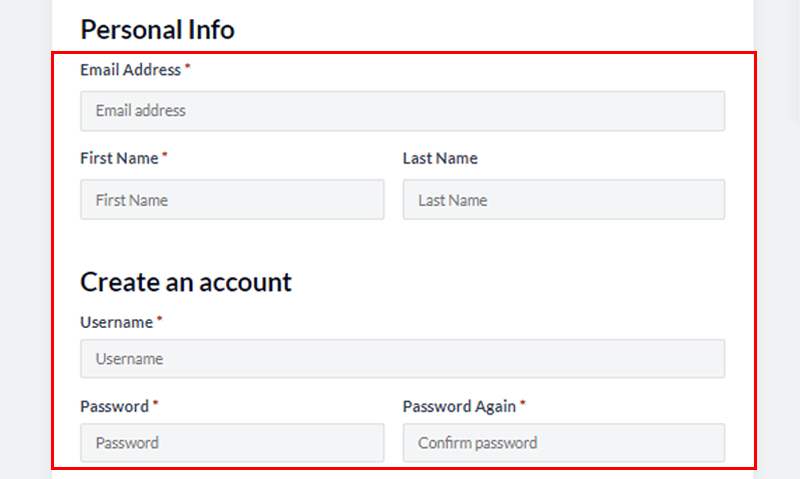
After that, the checkout page will open up.
Now, you’ve to provide all the required information and create an account. You can also insert a discount code if you have any.
Once you fill up all the info, click on the Purchase button, which is at the bottom.
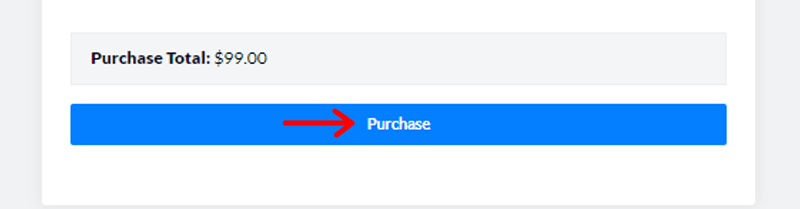
By following these steps, you can purchase the plugin and download the zip file on your local PC.
3. Uploading, Installing & Activating ProductX Pro
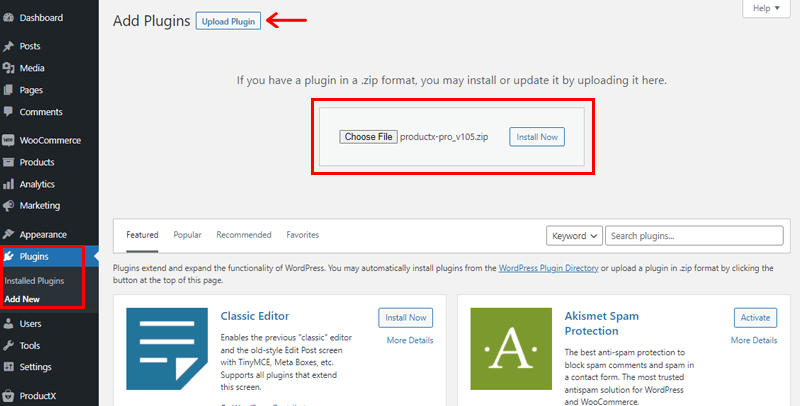
To install the ProductX Pro plugin on your website, you’ve to upload the downloaded zip file. To do so, you’ve to go to your WordPress dashboard.
From there, navigate to Plugins > Add New. Afterward, click on Upload Plugin and then Choose File. Now, you’ve to select and upload the previously downloaded zip file. Lastly, you’ve to click on the Install Now button.
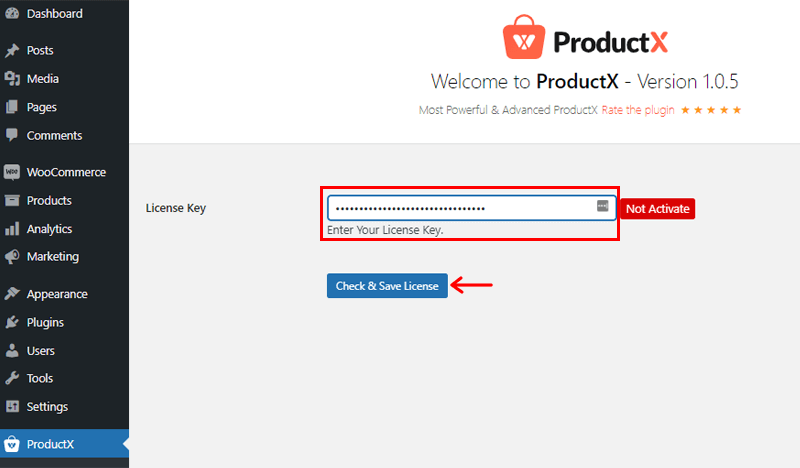
And after that Activate the plugin on your site.
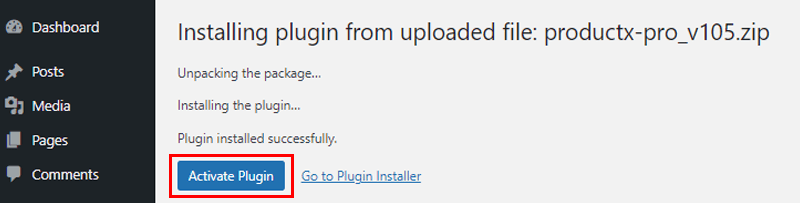
Not to mention, you’ll see a license key page where you need to insert the license key and save it. That will activate your license key.
Note: ProductX is a plugin that extends the WooCommerce functionalities by providing essential blocks. Thereby, you must install the WooCommerce plugin. And only then you’ll be able to use the ProductX plugin.
4. Setting Up the ProductX Plugin
Once you activate the plugin successfully, the ProductX menu will show up on your dashboard. Also, there are other sub-menus in this ProductX menu.
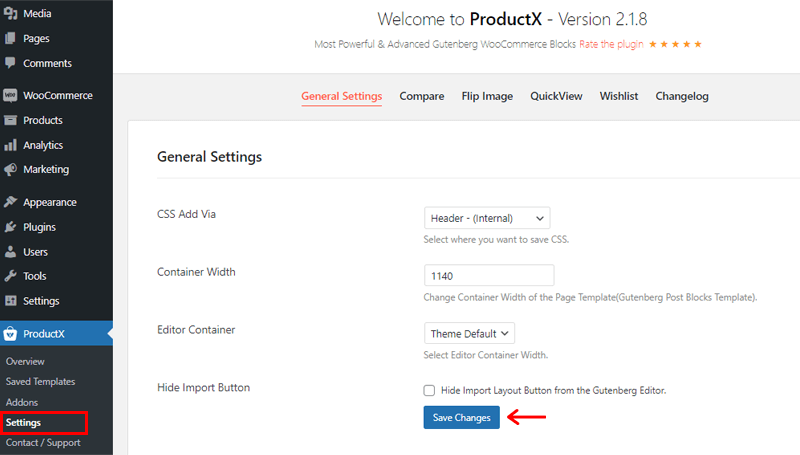
Right there you’ll discover the Settings section, and inside there is the General Settings option. Now, from there, you can make the changes that you want on your site.
Lastly, don’t forget to click the Save Changes button to save the changes if you’ve made any.
5. Creating a New Shop Page Layout with ProductX
In this section, we’ll be demonstrating to you how to use ProductX to build a shop page layout. To do that, we’ll be taking the help of the ProductX’s WooCommerce Builder addon.
Note: ProductX WooCommerce Builder is a pro feature of the ProductX plugin. So, make sure you have the pro version of the ProductX to utilize the builder’s features.
With the help of this addon, you can create a shop page layout effortlessly.
P.S. For your shop page layout, firstly, you have to create and publish your products in different categories. Thereafter, you’re ready to follow the below-mentioned steps precisely.
We’ve imported WooCommerce demo products for the upcoming demonstration.
Alright then, let’s check out how to create a shop page layout in detail.
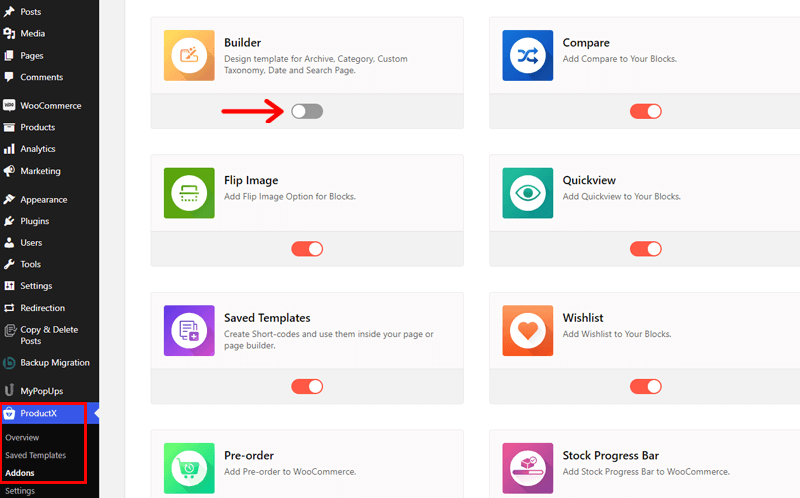
Step 1: Activate the Builder Addon
First and foremost, you’ve to activate the Builder addon. For that, go to ProductX > Addons on your WordPress dashboard.
From there, turn ‘On’ the Builder addon.
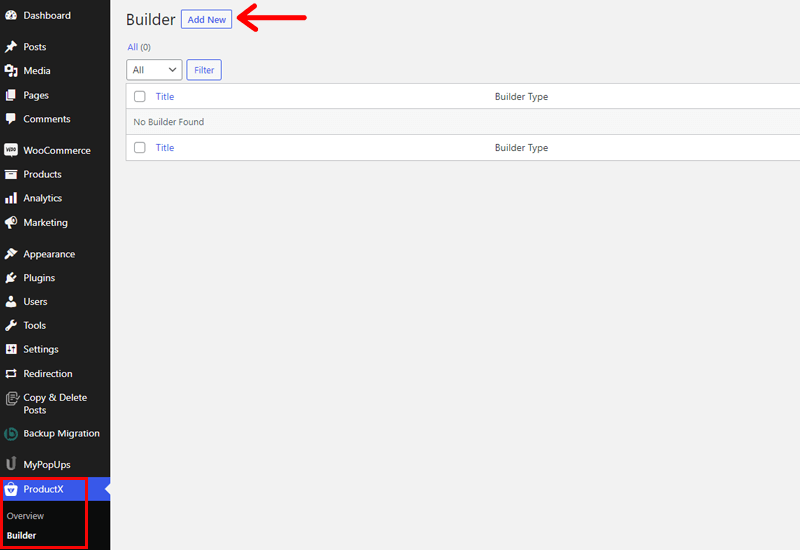
Step 2: Create a New Template Layout
With that, you’ll see a ‘Builder’ option inside the ProductX menu. Click on it. Now, for creating a new template, you must click on the Add New button.
Afterward, you’ll see a page that tells you to fill in the key information of the template.
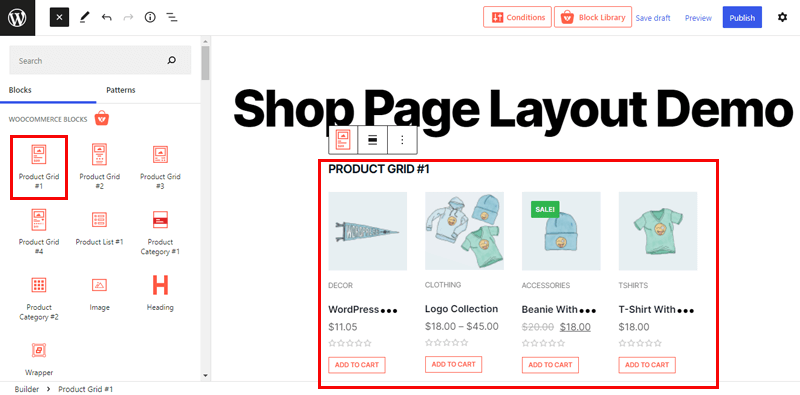
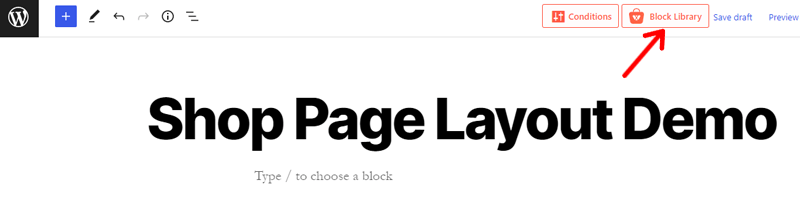
For instance, you’ve to enter the name of your template and select the template type. Here, we’ll provide the template name as ‘Shop Page Layout Demo’.
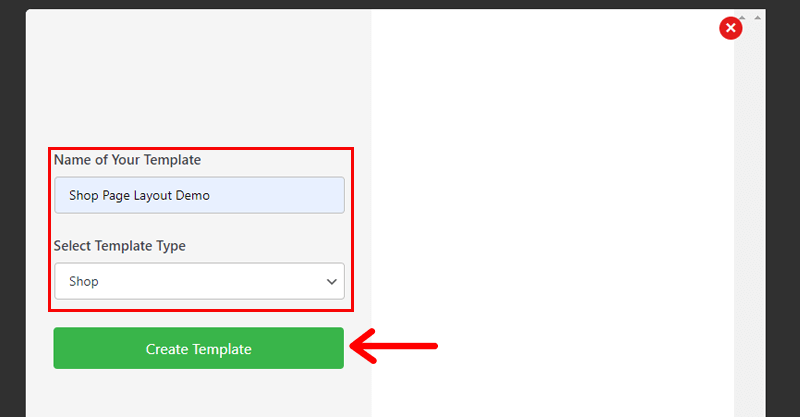
Likewise, on the Select Template Type field, you’ll discover 3 options. These are Single Product, Product Archive, and Shop. Now, as per your necessity, you can choose one option among them.
In this article, we’re focusing on the shop layout. So, we’ll pick Shop.
Similarly, on the right-hand side, you’ll see one more option, i.e. where you want your template to be displayed.
Based on the template you’ve chosen you’ll see different settings there. For example, if you’ve chosen Single Product, then you’ll see:
- All Product Single Pages
- Specific Product
- Specific product_cat
- Specific product_tag
On the Product Archive template type, you’ll get settings like:
- All Shop Archive Pages
- Shop Search Result
- All product_cat Pages
- All product_tag Pages
- Specific product_cat
- Specific product_tag
Meanwhile, there are no settings available in the Shop Template type. So, we’ll move forward by clicking on the Create Template button.
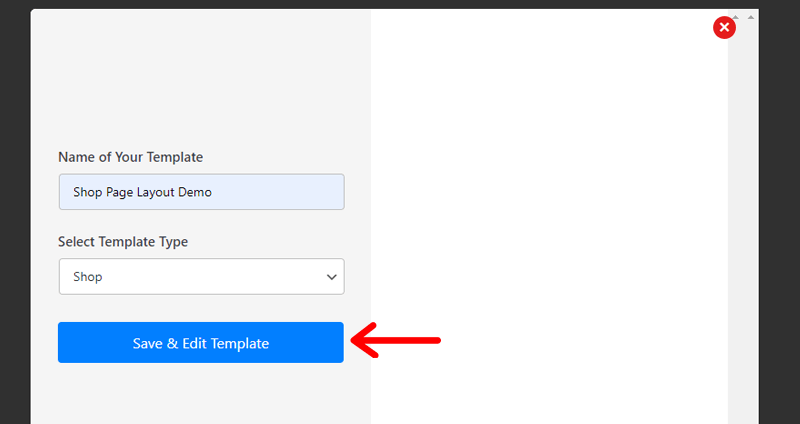
After waiting for a few seconds, Save & Edit Template button will show up, you’ve to click on it.
With that, you’ll be redirected to the Gutenberg Block Editor. Now, there are two methods to create the desired shop page layout of your own. The first method is to design it from the scratch with the help of the ready-made block designs.
And the other is with the use of the ProductX’s starter pack. So, let’s see both of these methods.
Method 1: Starting from the Scratch with the Help of Block Designs
To display products in style, the ProductX plugin offers tons of Gutenberg WooCommerce blocks.
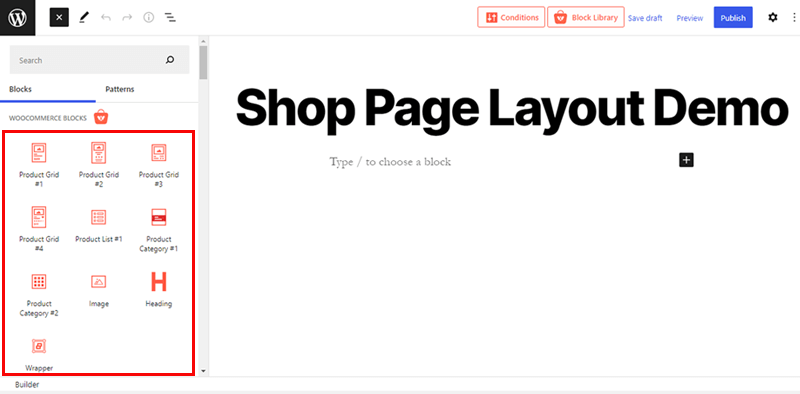
These are:
- Product Grid: The Product Grid block presents your products in the shape of a rectangular grid. There are 4 different product grids to display your products in a grid.
- Product List: This Product List block showcases your WooCommerce products beautifully in a list format. It’s the perfect choice if you’re looking to display a variety of products in a small area.
- Product Category: ProductX provides two different product category blocks.
- Heading: It allows you to add a heading to a specific section. You’ll get more options in comparison to the default heading block in Gutenberg. ProductX provides 20 pre-built heading styles that you can apply with a single click.
- Wrapper: The wrapper block lets you create a container for another block. You can use it for making your page content look unique.
- Image: You can add product images to your shop page with the help of this block. Plus, you can make use of the animation options to beautify your images even more.
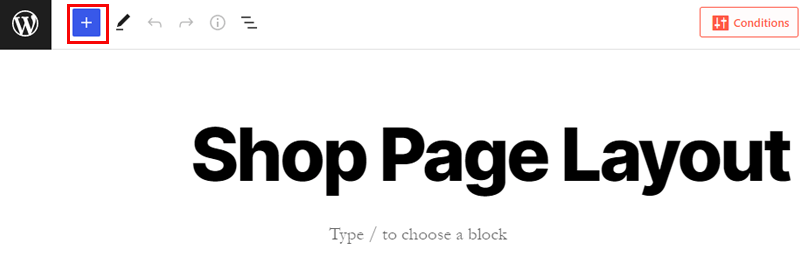
To get access to these product blocks, you’ve to click on the ‘+’ icon on the WordPress Gutenberg editor. Following that, you’ll discover all the WooCommerce blocks offered by the ProductX plugin.
So, all you have to do is select the type of WooCommerce block that you want on your shop page. Here, we’ve picked the ‘ProductGrid#1’ option. By clicking on your favorite block type, you’ll see a preview of it on the right-hand side.
After choosing a block, you’ll get options to change the block type, move the block up/down, change alignment, and more.
Moreover, you can add a new block or remove the existing one, as per your needs.
Also, you can further customize the block in the way you like. For that, you must select the block and click on the Settings option on the right side of the navigation area.
Following that, you’ll see a Block section. There are a few options and settings offered by ProductX for the purpose of customizing the product blocks.
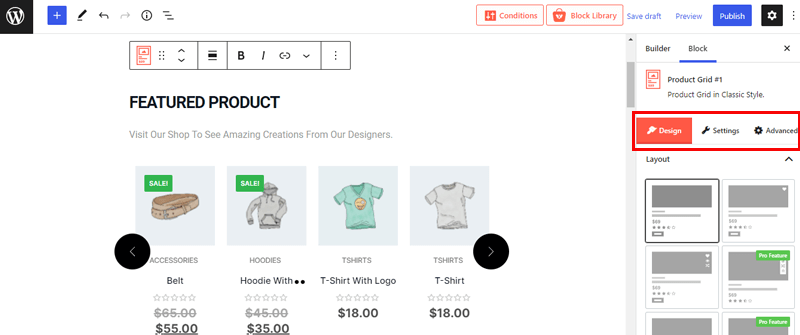
Mainly, there are 3 customization options available; Design, Settings, and Advanced. These options allow you to customize every aspect of your shop page easily.
We’ll dig deep into these customization options later on in the other section of the review.
Method 2: Using the Starter Pack Template to Create a Shop Page
ProductX’s block library has a total of 6 pre-designed free and premium starter packs. Before choosing one for your shop page, you can have a live preview of each of them.
After that, you might have a clear idea about which template to import. Once the template is imported, you can customize it as per your will to make your WooCommerce store unique.
Moreover, it features 20+ ready-made block designs. This means you can insert only the needed sections for your shop page instead of the whole page.
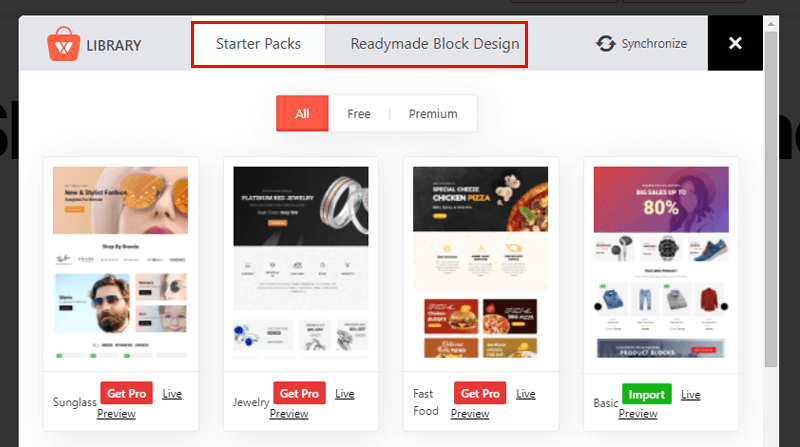
There, you’ll discover the Block Library option at the top right side of the menu bar, you need to click on it. In the library, you’ll see amazing starter packs and ready-made block designs.
Each of these starter packs and ready-made block designs is arranged into free and premium options.
At this moment, we’ll be discovering only the Starter Packs section. Now, choose a template that you found attractive for your shop page. To have a preview of the template, you must click on the Live Preview option.
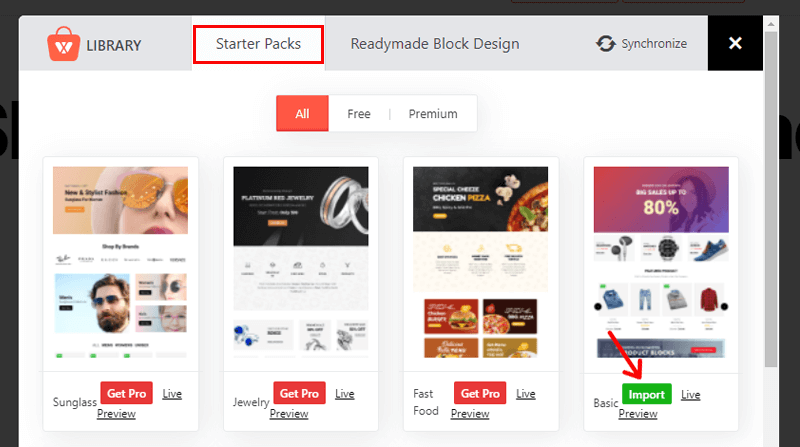
Once you decide the one for your WooCommerce store, click on the Import button.
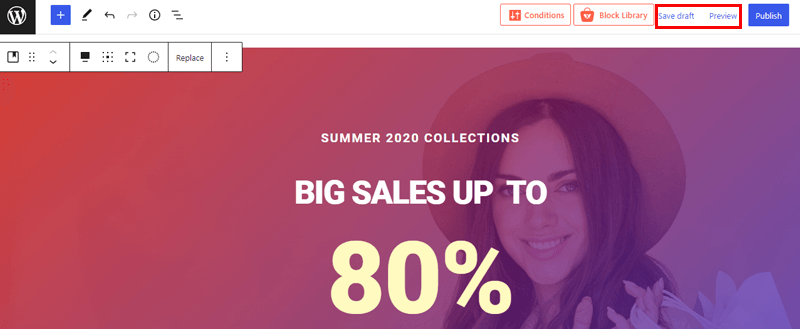
After waiting for a few seconds, the template will appear in the editor. You can save your work up to this moment by clicking the Save draft option. You can click on the Preview option to see how your shop page looks.
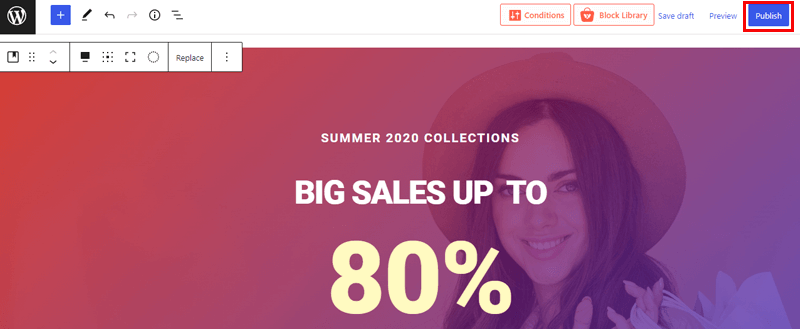
Lastly, you can publish your shop page by clicking the Publish button.
Note: By following the same process, you can import ready-made section blocks. The steps are the same for adding the templates and ready-made section blocks.
6. Customizing the Shop Page using ProductX Blocks
To get access to customization possibilities, you’ve to click the block. On the top, you’ll discover the name of the block style that you’ve chosen. Below that, there are 3 different customization options. These are:
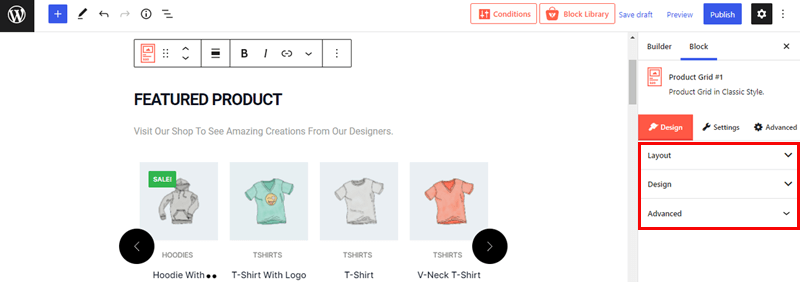
I) Design
Design option has 3 different elements:
- Layout: It provides multiple layout designs.
- Design: This option suggests new block designs for displaying your products in style.
- Advanced: From here, you can add additional CSS classes to the design.
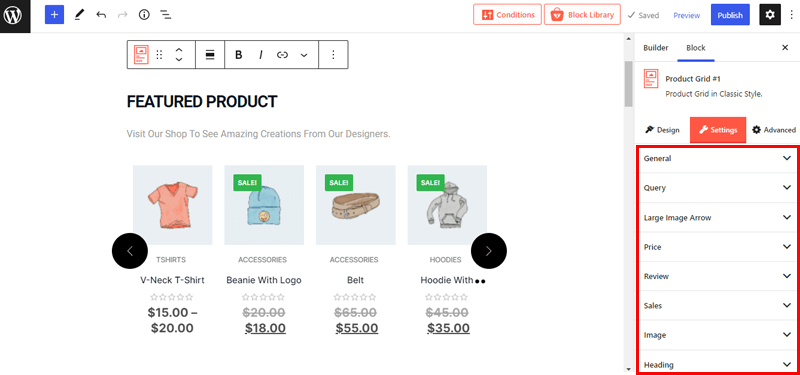
II) Settings
Here, you’ll discover several settings for customizing each part of your product block. And these settings may vary according to the type of block you choose. Some of the common settings that you’ll get here are Image, Title, Category, Filter, etc.
Besides that, let’s get to know a few other important settings:
- General: Here, you can show/hide different contents of the block. Plus, you can showcase the products in either grid or slide view.
- Query: It lets you use the pre-built query to display your content based on different criteria.
- Overlay Meta Elements: This option allows you to set elements such as color, background color, border, border radius, padding, etc.
- Price: From here, you can fix price color, typography, and padding.
- Review: This option allows you to manage empty color, fill color, and margin.
- Sales: From here, you can enter sale text, position, design, and style.
- Cart: Here, you can insert cart text and active text. You can also set typography, color, spacing, padding, and more.
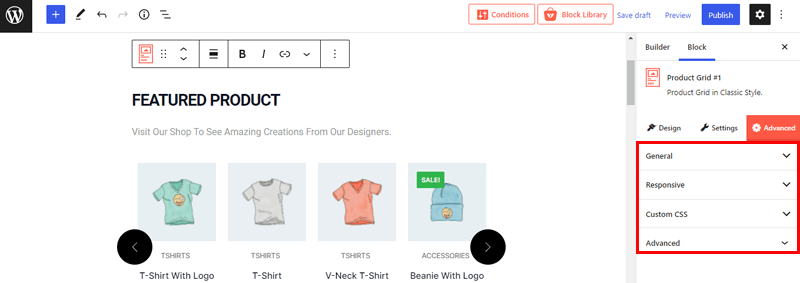
III) Advanced
Based on the design you’re using for your shop page, there are a few advanced settings available. And these are:
- General: It lets you fix margin, padding, background, border, border-radius, etc.
- Responsive: From here, you can hide a specific block on all the devices.
- Custom CSS: This option offers you a large text area for inserting your own custom CSS.
- Advanced: It includes a text area where you can enter additional CSS classes.
7. Preview the Shop Page
Lastly, you can see the image of the shop page that we’ve created using the ProductX plugin. You’ll be glad to know that it took not more than a few minutes, and it’s ready to use.

That’s it! By following the above-mentioned steps, you can effortlessly create the shop page layout with the WooCommerce builder addon of the ProductX plugin.
Conclusion
In this tutorial, we showed how with the use of the ProductX plugin, we can make custom WooCommerce shop layouts. We revealed there are two different methods for creating a shop page layout and showed the processes in depth.
We believe now you can create your own stunning and attractive shop page layout for your eCommerce store. Give it a try if you haven’t yet. Following that, we hope you’ll be able to receive all the goodies from your store.
If you’ve any doubts or queries, then let us know in the comments section. And then, we’ll reach out to you.
Also, check out how to create a gallery in WordPress and how to add email subscriptions in WordPress.
Follow us on Facebook and Twitter to keep an eye on such other interesting articles.


