In the previous post, we talked about how to create the private post in WordPress. Now, in this blog post, we are going to share about how to create password protected page or post in WordPress. Creating a password protected post is somehow similar to the private post. But in password protected post, you can set the password for the post and if visitors want to see that post/page, they need to enter the valid password to see the content.
Creating a Password Protected Post
Follow the below steps to create password protected post,
- Login to your WordPress admin dashboard. ( www.example.com/wp-admin )
- Create a new post or page.
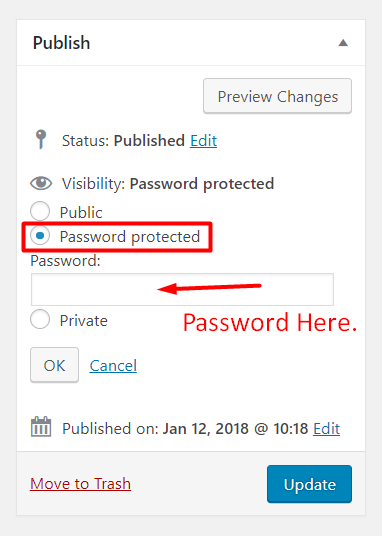
- In the Publish section of post edit screen, check Visibility menu.
- Click on Edit Option
- You will see the option for Password protected
- Select that radio button option
- After selecting it, a field for password will appear
- Enter the password and click Ok. (The same password will use to see the page/post from front end)
- Checked that option and click on Publish button. If you don’t want to publish it, you can save it on draft as well.
- You successfully create a Password Protected Post.
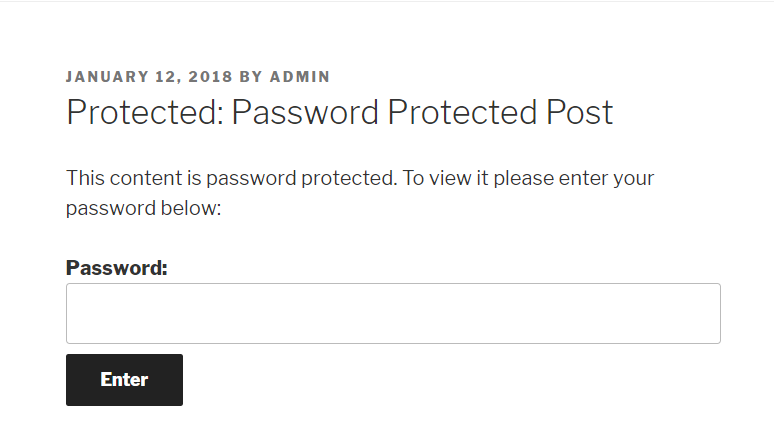
Front View of Password Protected Post
To view the post on the front end, the visitors must enter the valid password for it. screenshot looks like,
Hope, this article is very helpful to create password protected post. If you have any confusion regarding this post, drop your comment below.