Did you know we can make an online course website using WordPress for free? If the answer is no, stay here because you are in the right place. Even if you are well known about this, today here we are going to share the best and easy method to make an online course website using WordPress.
With this method, you can easily start a WordPress website where you can sell online courses and can earn huge money. Without any technical knowledge, you can make such a website and sell your course globally.
Making such a dynamic website for the online courses is tedious and you have to spend a huge amount of money if you want to make it on other platforms. Thus, we are going to recommend you WordPress and it’s a plugin for it. In this post, we will share how to use that plugin and make online courses using it.
From the available list of various available plugins, we did research on all of them and finally found that Tutor LMS plugin is the best one. It is totally free and developed by a trusted team. Hence, they provide free support and updates for this plugin too. Besides that, they offer premium extension so that you can add more functionality to your website too.
Steps to make an online course website using WordPress
Steps you need to follow,
- Make a WordPress Website
- Install and Configure Tutor LMS Plugin
- Add New Courses
- Manage Courses Settings
- Promote your courses via social media
Make a WordPress Website
The first step is to make a WordPress website. If you already have any blog website, you can also convert that site to an online course website by adding the functionality. That is also a good and easy method. Because you don’t need to make a website from scratch.
Tutor LMS plugin is compatible with every theme that is available in the market. You don’t need to think about making a completely new site. However, if the previous blog is not relevant to add an online course, we recommend you make a new WordPress website.
See here how to make a WordPress website easily.
Install and Configure Tutor LMS Plugin
Just after completing making website, you need to install and configure the Tutor LMS plugin.
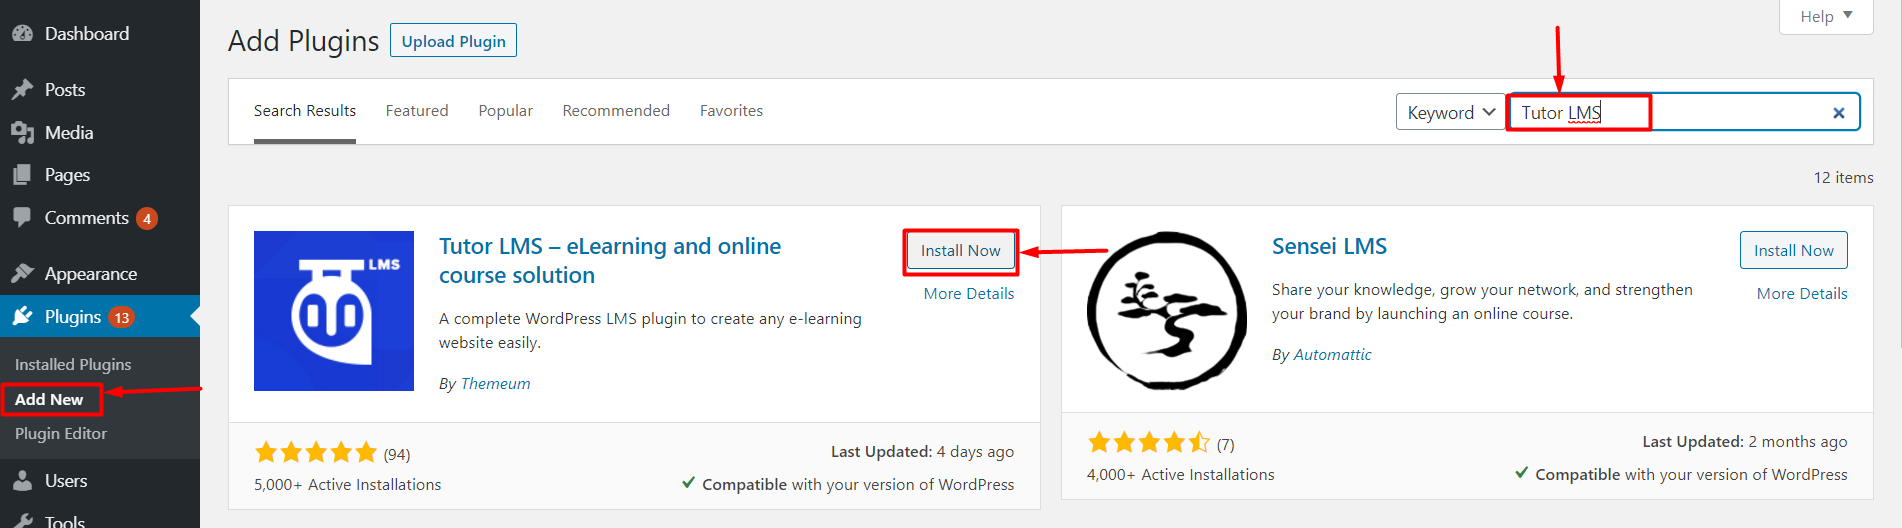
- From the Admin, dashboard go to Plugins
- Click on Add New
- Search Plugin Tutor LMS
- Next, click on Install and Activate
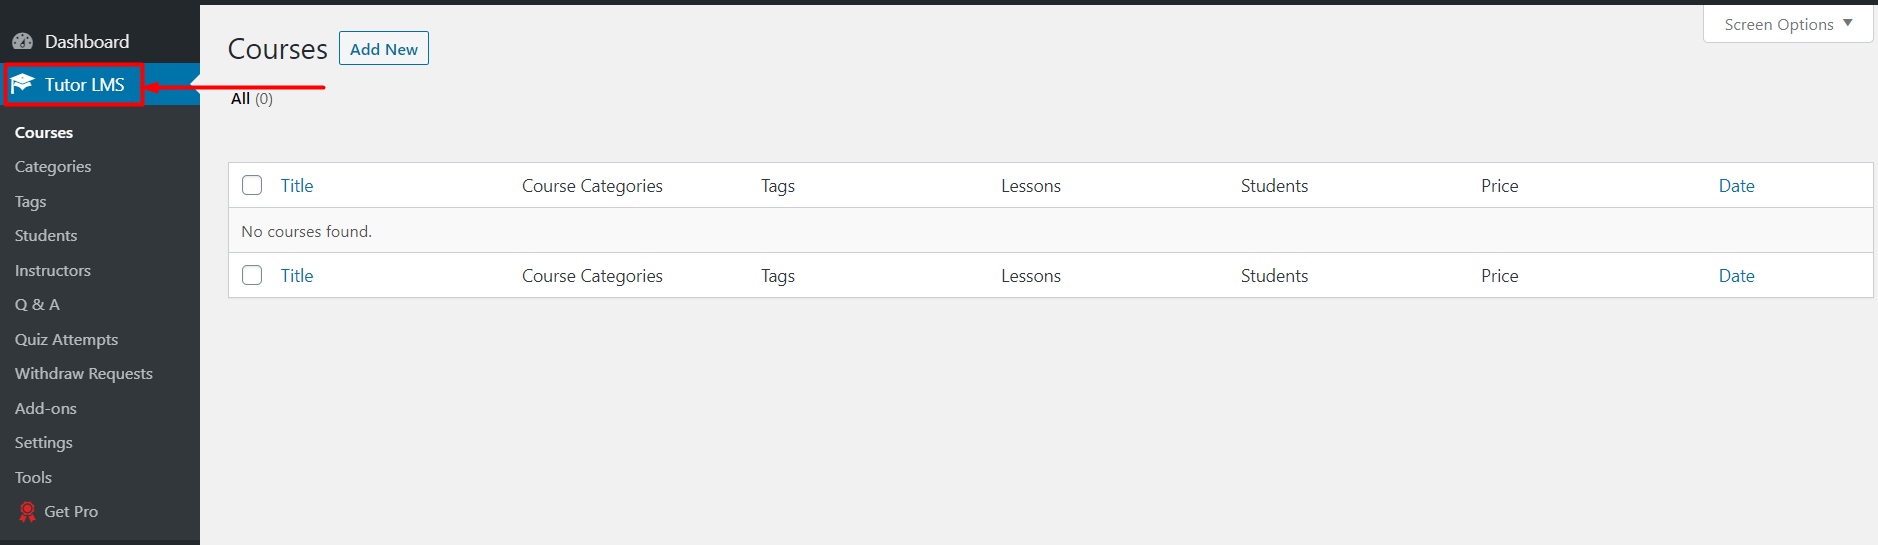
After the plugin gets activated, you will see a new menu in the admin panel to configure the online course. You need to manage everything about the online course from that section.
Add New Courses
The next work is to take courses on the dashboard. From the Tutor LMS menu of the admin panel, go to the courses.
- Go to the courses
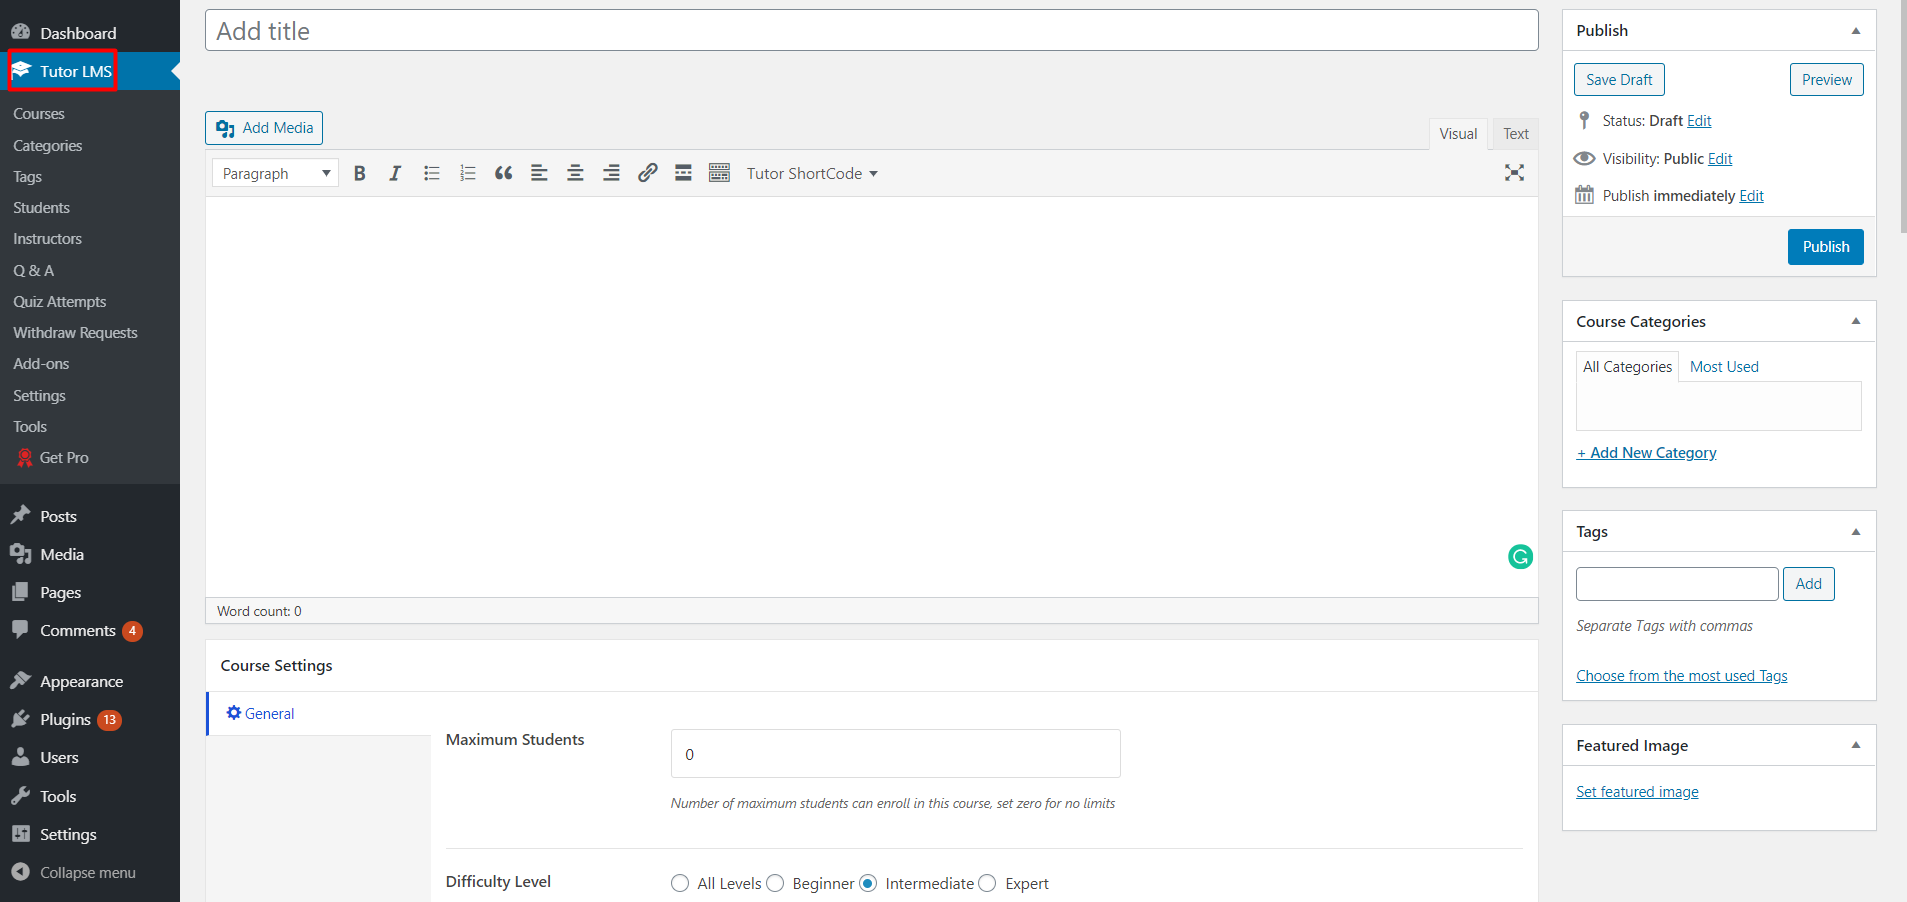
- Click on Add New
- Give the name of the Courses
- Write the detailed instructions of the courses
- In the course setting section, enter the maximum number of students for the enrollment and choose the difficulty level
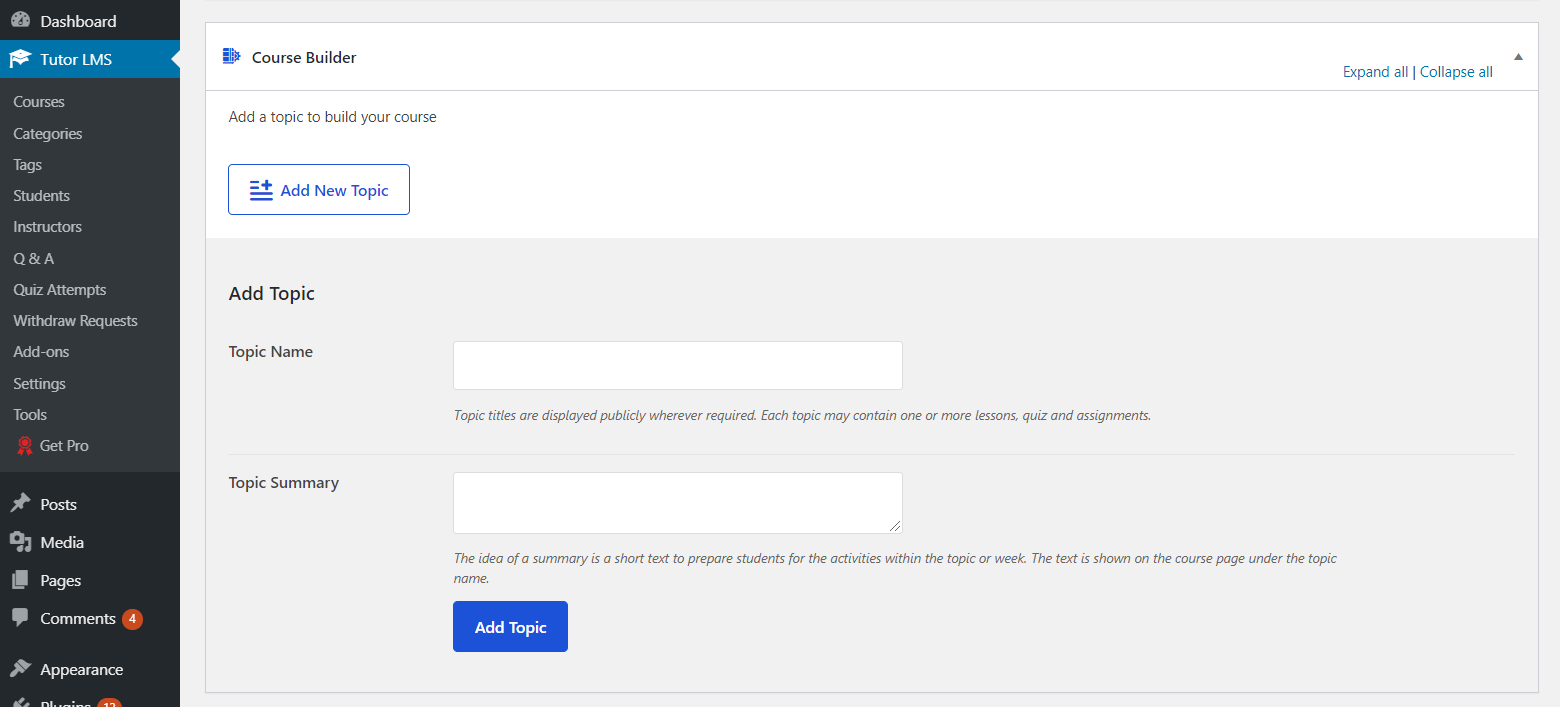
After that, you have to build the course using the course builder section. You need to put the topic and its summary. From the additional data section, enter the required things based on the given section information.
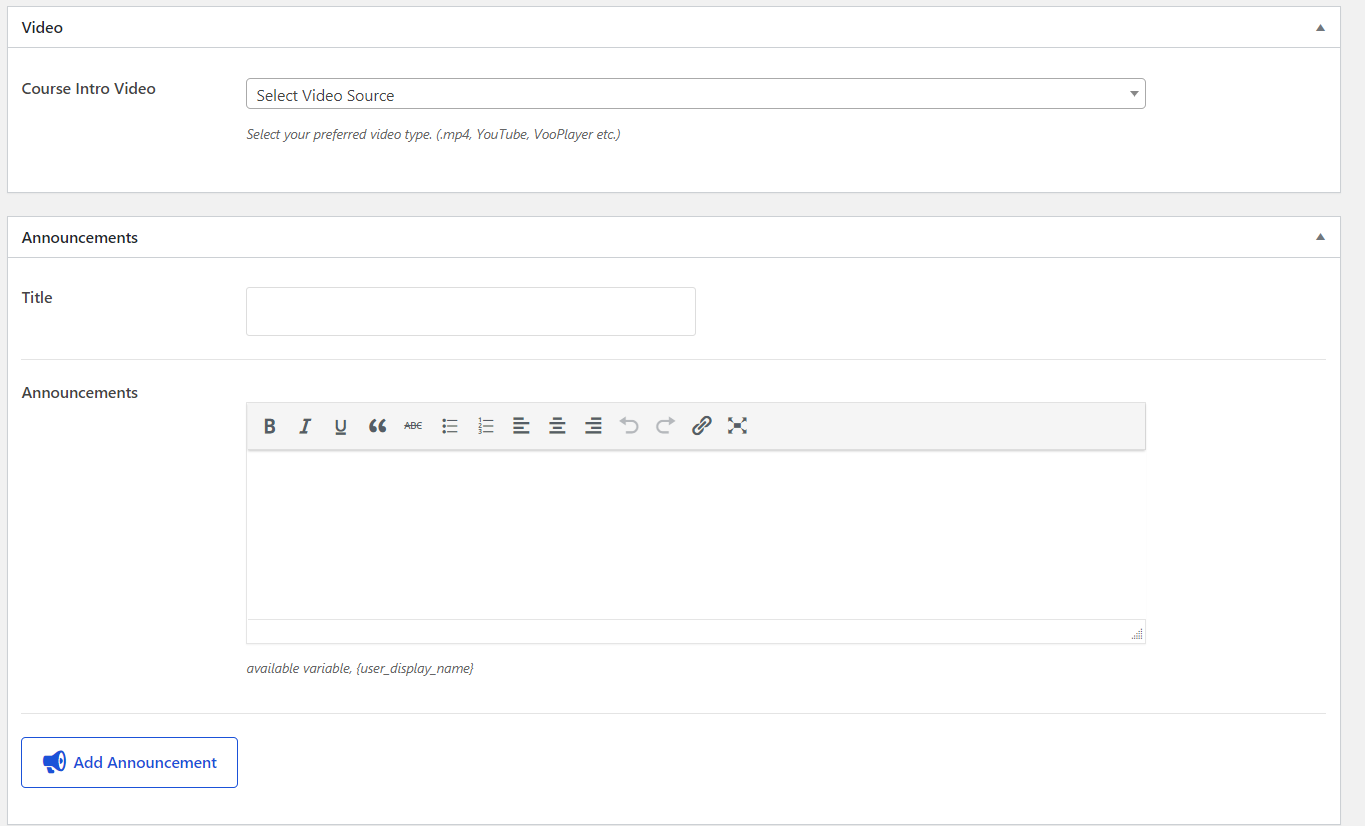
In addition to that, you can add the video and announcement for each course as well. Go through every section there and fill the information.
When you add all the information on the dashboard, you can see the course using the view course button. The front page view of the respected course will look like this.

Now you have successfully able to add the online course on your website. If you offer more than one course, you can add another course like a similar process above. You can add an unlimited number of course.
Manage Courses Settings
Tutor LMS plugin comes with tons of very useful features to manage your online courses. Thus, you need to check all the available options in the settings. Each setting has clearly mentioned descriptions so that you can understand them easily.
From the Tutor LMS menu of admin panel go to the settings. You will see a TAB structure where you can get the settings for everything.
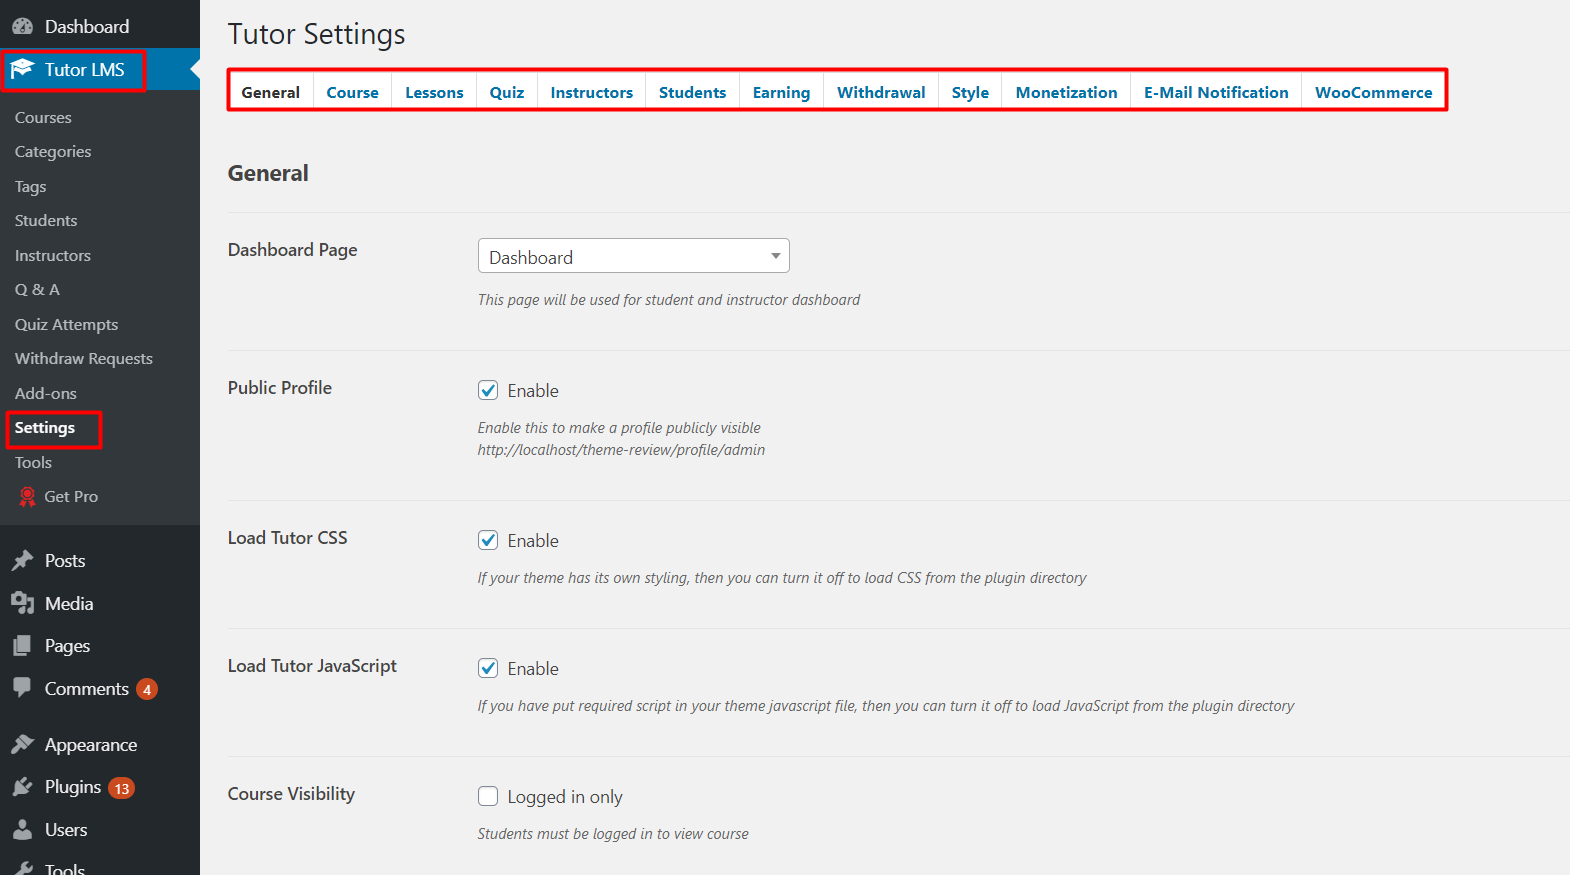
To enable the payment method, you need to use either WooCommerce or Easy Digital Download plugin. So, use any of that plugin and enable the option for the payment while students get enrolled.

Promote your courses via social media
Now, the next step is to promote your courses via social media. You can use social media like Facebook, Twitter, Linkedin, and Instagram. There are various methods to promote your courses. You can also write blog posts regarding the importance of online courses and the courses you offered.
While running a paid online course, you need to reach a niche audience. Thus, find a particular audience and promote your course.
Conclusion
Make your own online course website today and monetize your knowledge globally through the help of the internet. Do comment below if you need any help with suggestions while making a website. We are happy to help and assist you.
Sharing is Caring!


